You’re in the studio waiting room, scrolling your saved pins at 2 a.m., and that shoulder cap tattoo you sketched months ago finally feels ready. Designing a shoulder cap tattoo that wraps the shoulder perfectly is about flow, scale, and a few practical tests you can do before the needle ever touches skin. This guide shows you how to plan, test, sit for, and protect a shoulder cap tattoo so it heals like the reference photo in your head.
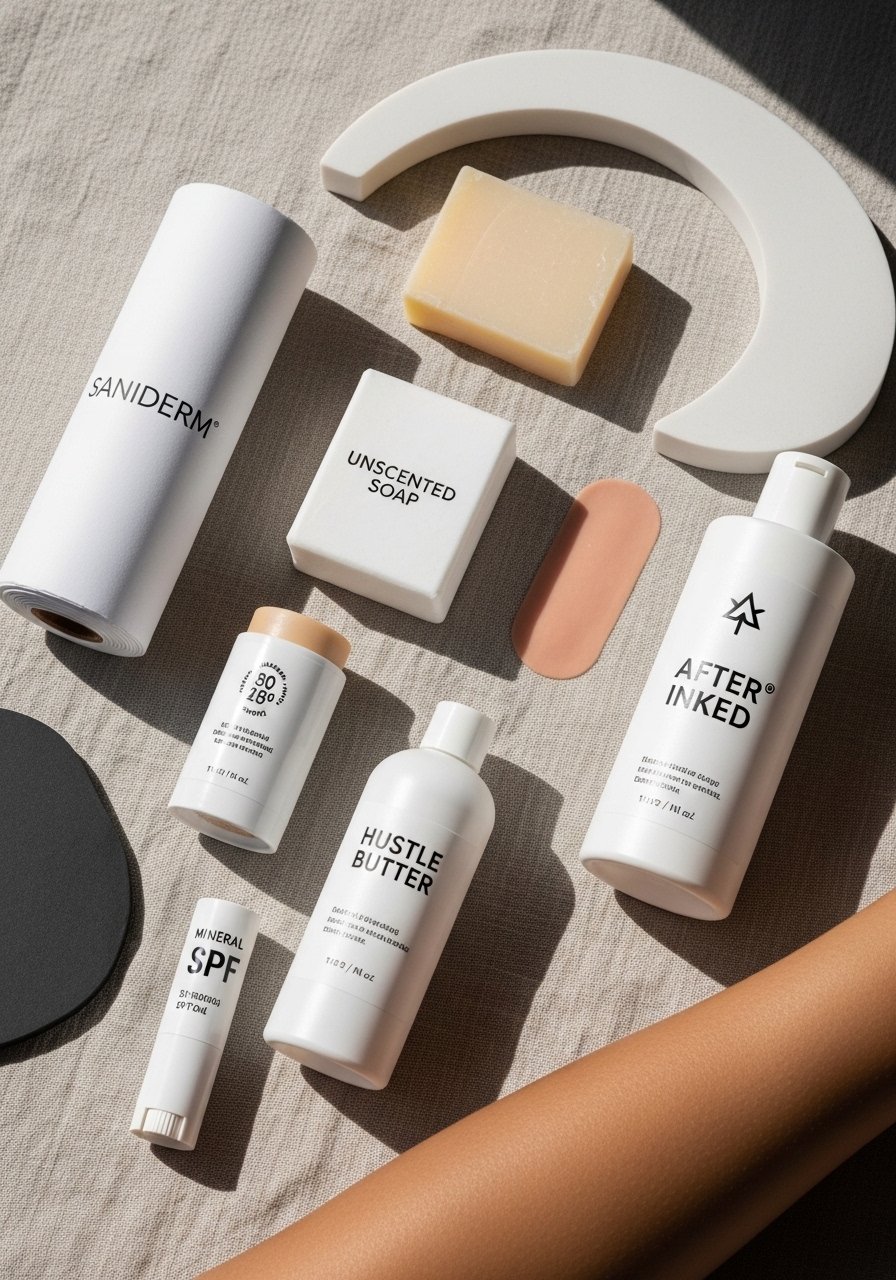
I always prep with a thin layer of numbing about an hour before longer sits — try zensa numbing cream if you want gentler edge control. For aftercare, have a roll of Saniderm rolls and a fragrance-free wash on hand; they cut the early stress out of healing. Read on for placement tips, an aftercare routine, pain and healing timelines, and what to tell your artist.
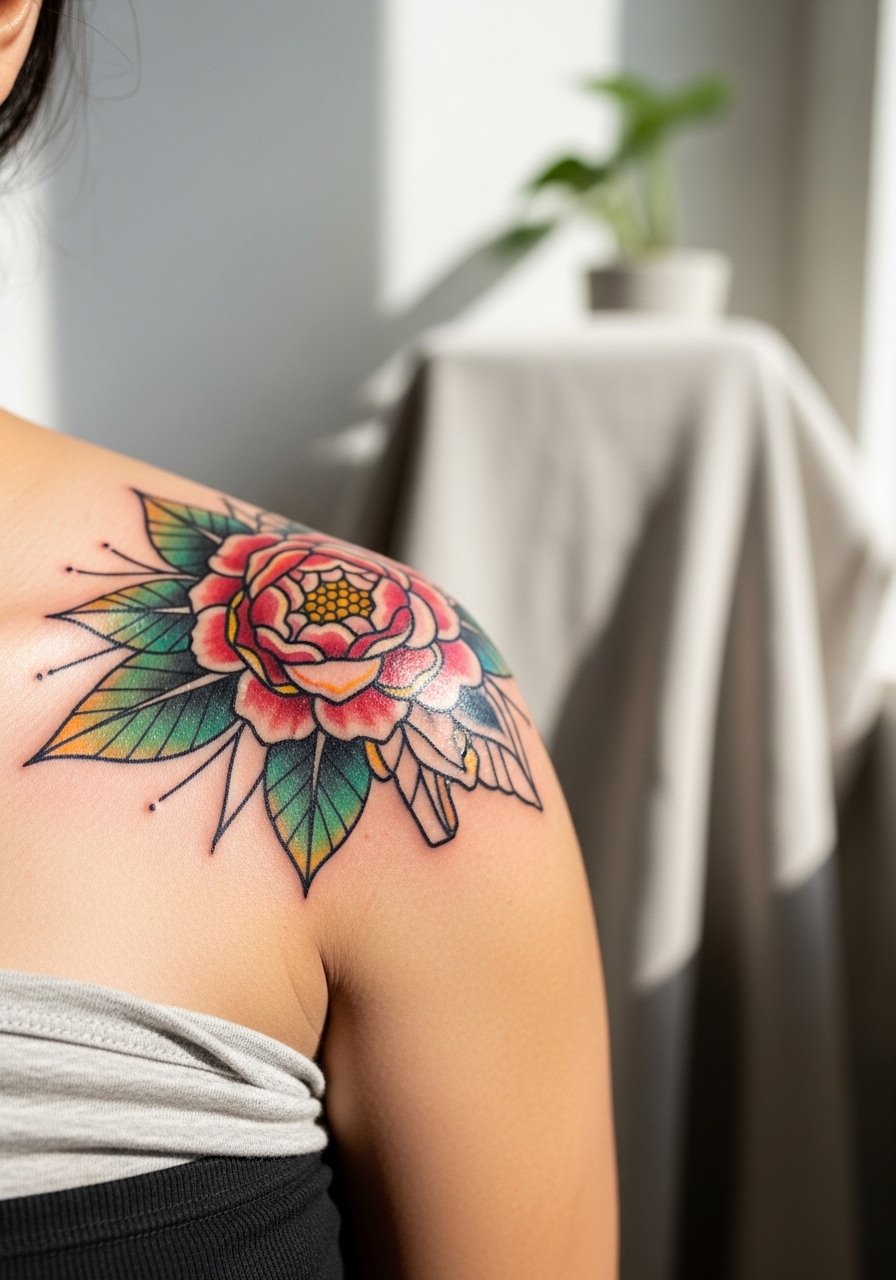
Map the design to your shoulder cap (fine line, blackwork, neo-traditional)
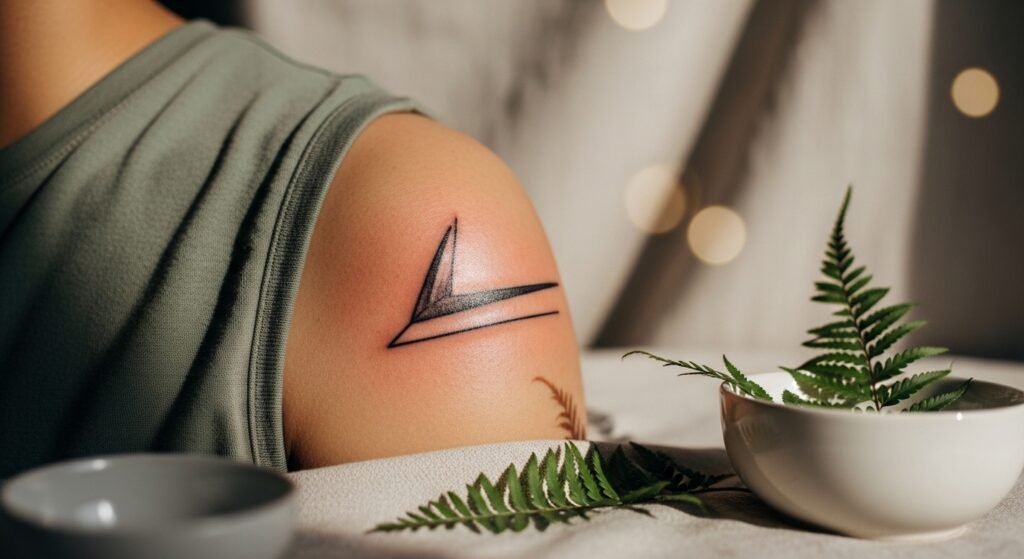
Start by considering the shoulder cap’s curvature and how the design will wrap toward the chest and back. Fine line and minimalist pieces need crisp negative space; blackwork and neo-traditional designs need bold edges to read from different angles.
- Trace the shoulder arc on paper or use a moleskine sketchbook to rough the wrap.
- Scale designs so the widest element sits on the roundest part of your deltoid; small details on the edge will blur when the arm moves.
- Bring references showing flow across the shoulder — photos with a 45-degree view help the artist place highlights and shadows.
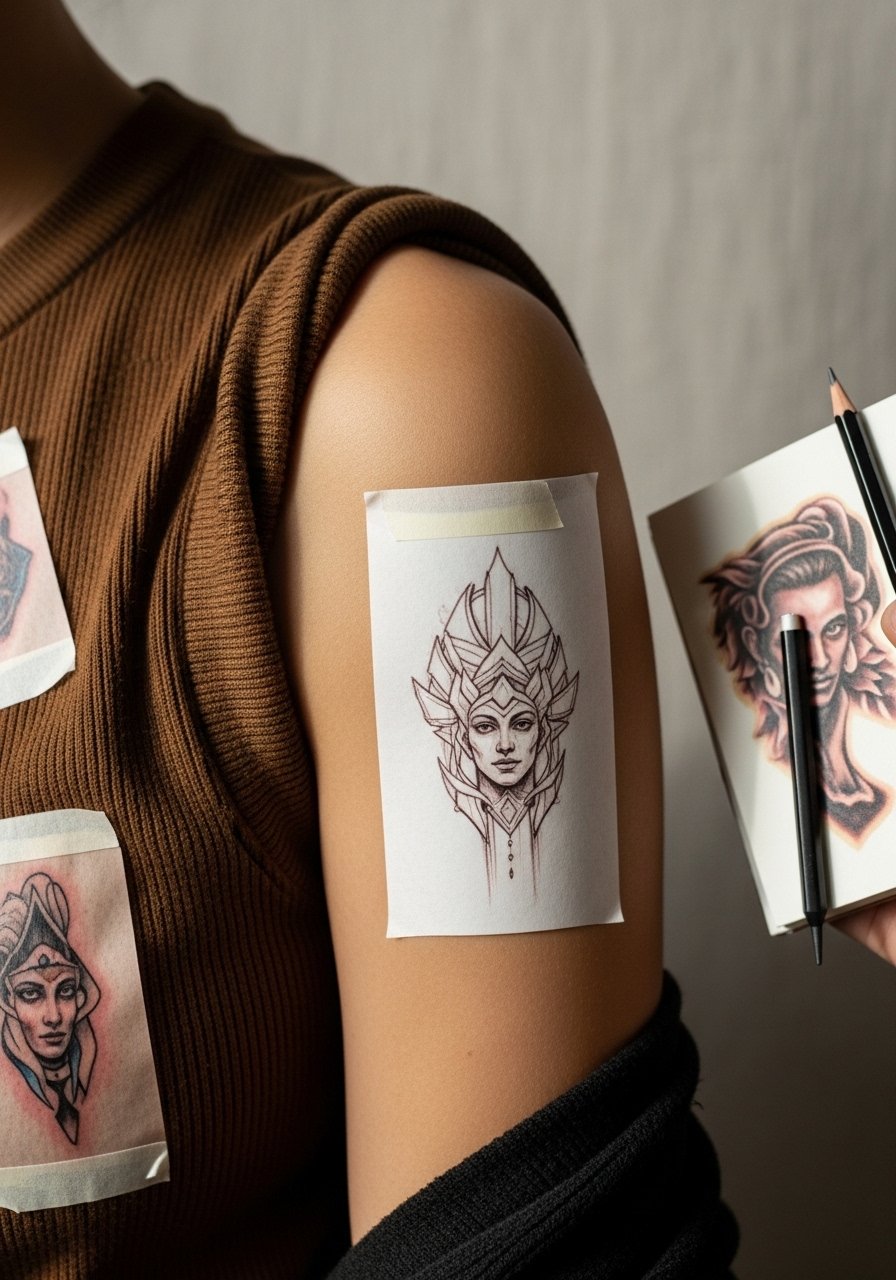
Test placement and stencil tricks (beginner placement, testing placement)
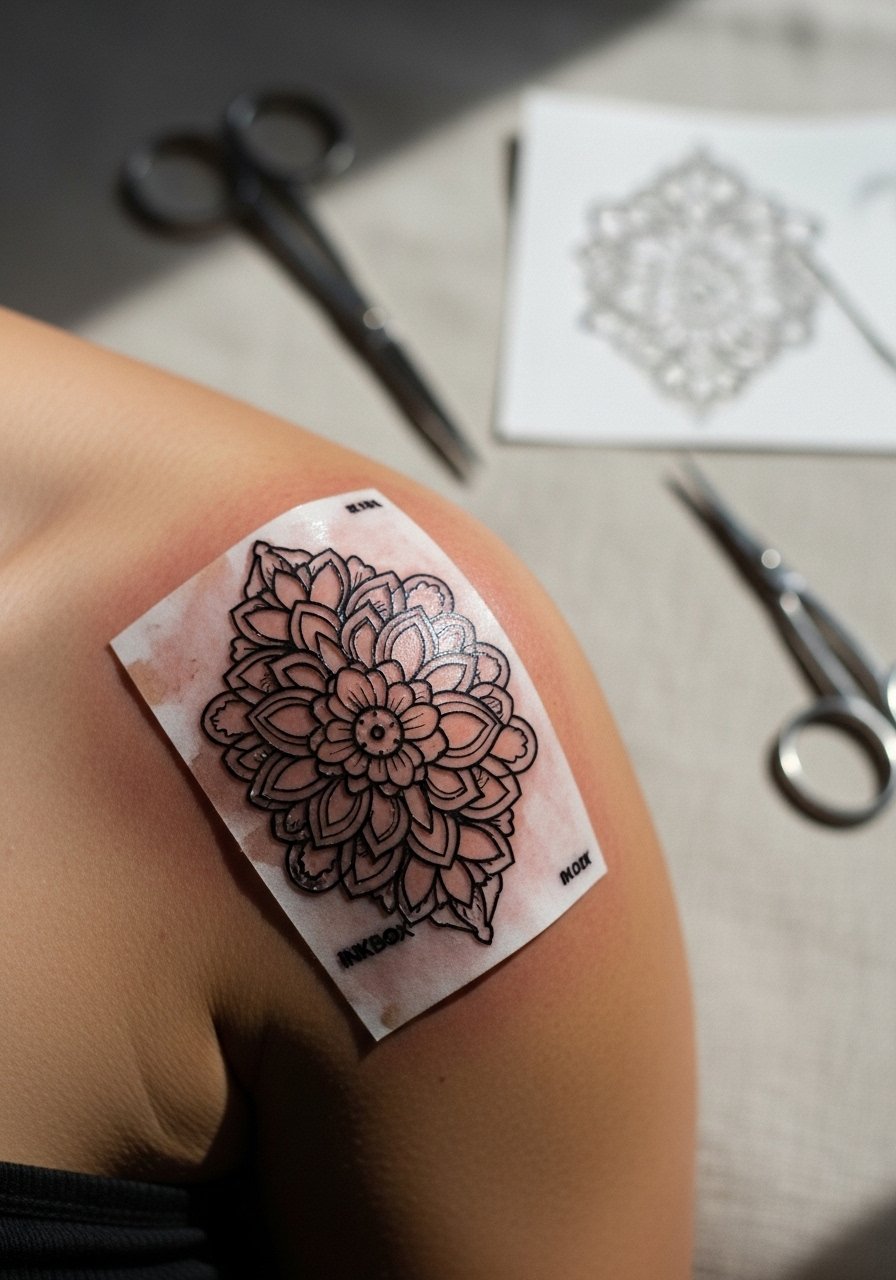
Don’t guess placement. Test with a temporary option first.
- Use an Inkbox semi-permanent tattoo kit to see daily movement and clothing rub.
- Try stencil transfer paper to print the exact size and position.
- Wear it for a day—check how bra straps, shirts, and motion affect wrap.
If something shifts visually, scale or rotate the piece until the preview feels natural.
On the chair: pain, session prep, and first wash (pain, aftercare routine)
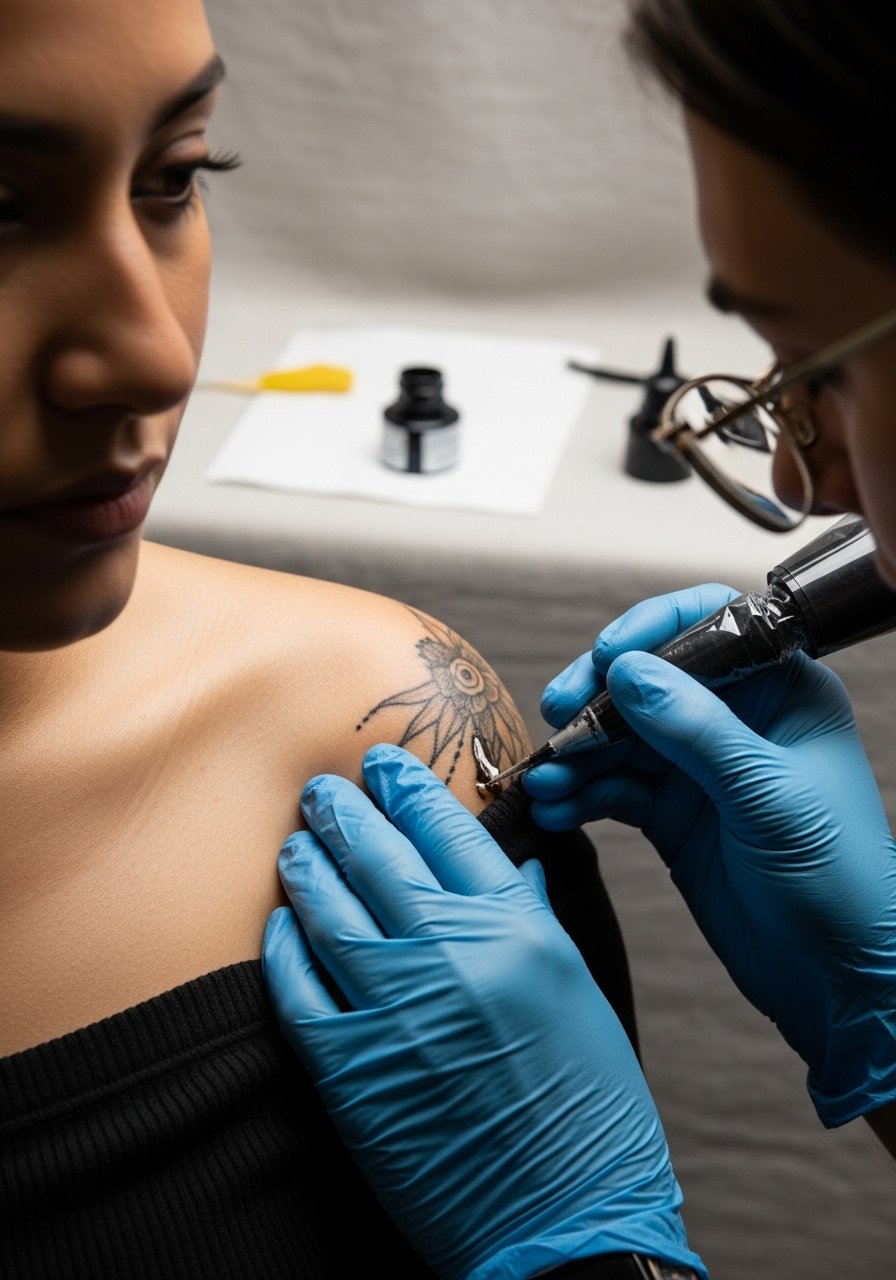
Shoulder cap pain is moderate for most people, but ribs and collarbone edges can spike. Prep smart:
- Shave the area 1–2 hours before with a pack of disposable single-use razors if your artist asks.
- If you’re anxious about pain, apply zensa numbing cream 45–60 minutes before sitting.
After the session, many artists leave a second-skin. If you plan to self-cover, apply Saniderm rolls for 3–5 days. First wash: gently remove the wrap, wash twice a day with a Dr. Bronner’s unscented soap, pat dry, then apply a thin layer of After Inked tattoo lotion twice daily.
Watch the healing stages and protect color (healed results, touch-up)
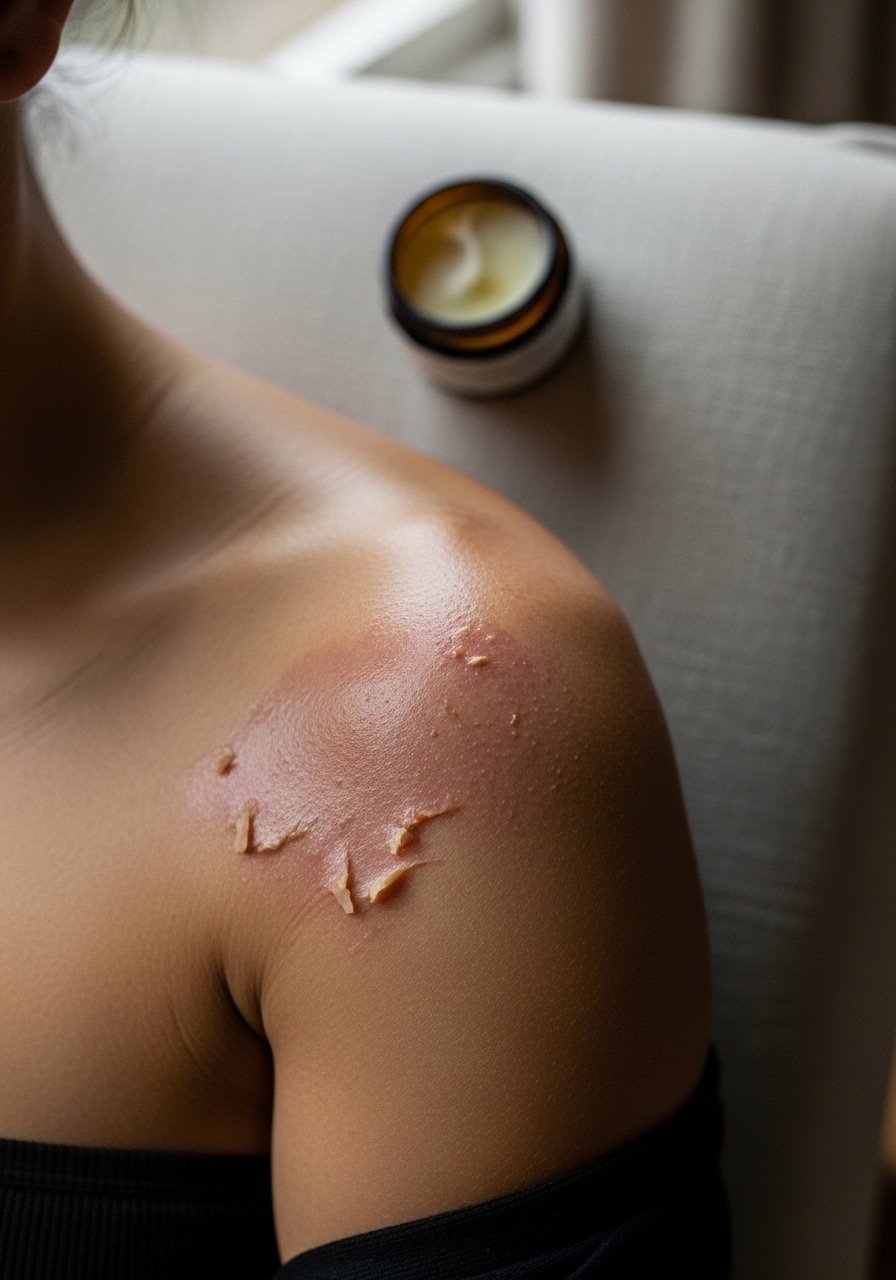
Expect the common stages: clear plasma first 48–72 hours, light scabbing and flaking days 3–10, surface healing by 2–3 weeks, settled color by 2–3 months. Tips:
- Don’t pick scabs—let them flake. Picking causes patchy healing and possible touch-ups.
- Use a small dab of Hustle Butter Deluxe once the skin is past the sticky phase to soothe itching.
- After fully healed, apply a mineral SPF stick SPF 50 daily to prevent UV fading.
- For long-term vibrancy, massage a drop of vitamin E oil into the area weekly.
Common mistakes and when to book a touch-up (beginner placement, touch-up)
Avoid these mistakes:
- Over-moisturizing during peeling—apply lotion thinly twice daily.
- Sun exposure in the first 8 weeks—cover or use SPF after healed.
- Picking and heavy friction from straps and bags.
If you notice patchy lines or color loss after 3 months, book a touch-up. Most artists expect to touch healed work between 3–6 months.
You’ve got the plan and the products—now pin this before your consultation and prep your aftercare kit the night before. A final pro tip: bring photos of how the design should wrap (side, front, back views) and trust your artist’s flow suggestions. Which wrap direction are you leaning toward—forward across the chest or sweeping back? Drop it below!